ARCHIVED: Hello, beautiful people! I’m writing to you from a chilly, cloudy, windy Marengo, Illinois. It’s March 17, 2021, and I’m feeling pretty lucky. Lucky that I’ve been able to package up and send over 440 seed packets across the country. Lucky that I’ve had phenomenal outreach thanks to Facebook, and engagement from my community like I could only have imagined. This project may only be a few months old, but it’s beginning to root and shoot out buds, so to speak.
I promised I would create a page here on the website helping everyone out when starting the seeds they received. Over the course of the next few months I will be uploading helpful tips, tricks, guidelines and external resources (YouTube has an AMAZING first-time gardening tutorial selection – I still learn so much every day!)
First off: do you know when your area’s last frost date is? When gardening, especially growing crops that require a long season, it’s crucial to follow along with the first and last frost dates. Loofahs are extremely sensitive to cold AND require a very long growing season, so I use the dates to plan when I will start my seeds indoors.
Where are you gardening, and what does Dave’s Garden say about your frost dates?
CLICK HERE TO INPUT YOUR TOWN AND SEE WHEN YOUR FIRST AND LAST FROST IS.
Marengo, Illinois for example:
Each winter, on average, your risk of frost is from October 4 through May 4.
Almost certainly, however, you will receive frost from October 14 through April 17.
You are almost guaranteed that you will not get frost from May 21 through September 23.
Your frost-free growing season is around 153 days.
THE FARMER BEAT TIP: I will err on the side of caution and not plant my (hardened off) loofah transplants until after May 21st, 2021. And eight weeks prior to May 21st (if we start them on heat mats or somewhere warm like the top of the fridge), we would want to start our seeds on Friday, March 26, 2021.
So given that loofah takes between 80-120 days (depending on variety), if I get my loofah in the ground on May 21, by August 29 I should see my loofah beginning to dry out. And to be sure I get a crop, I will be planting them in successions up until the middle of June!
THE FARMER BEAT TIP: I enjoy using this website to calculate how many days to harvest.


I’ve Got The Seeds, How Do I Start??
I’m going to be documenting my seed starting, hardening off, transplanting, tending, harvesting and processing journey this year, but in the meantime I think it’s important that anyone growing loofah be aware of what they’re getting into. This plant can be fickle, and needs the right environment to thrive. It’s a vining plant in the cucumber family, so it can get very, very long (like… 30′ long). I am sharing some growing advice from a page I trust called The Art of Doing Stuff.
- If you’re in a cooler zone (we are 5b/5a, so on the cool side), start your loofah seeds early, indoors, 6 – 8 weeks before the last frost date.
- Use new loofah seed and soak them in water for 24 hours prior to planting. Seeds that have been hanging around for years probably won’t germinate. (My seeds are from last season, 2020)
- Increase your success at germination by starting your seeds on a seed heat pad. Sow seeds and then place their pots on the warmth. (THE FARMER BEAT TIP: invest in a heat mat for all your tomatoes, peppers and flowers, too!)
- Transplant into biodegradable or paper pots once the first “true” set of leaves have formed. Using pots that decompose reduces the risk of transplant shock which loofah plants are prone to.
- For an even BETTER chance of reducing transplant shock, grow in soil blocks instead of pots.
- When the weather is right (warm soil and air) start hardening off your seedlings. This is more important than with most other plants because loofah are so prone to transplant shock.
- After a week or so of hardening off, plant your seedlings in an area that gets FULL sun. As much sun as possible. Anything less and you won’t get any loofahs.
- Plant your seedlings at the base of a really strong structure that its vines can climb on and cling to. Chain link fence or something similar is perfect.
- If after planting out, a cold snap threatens, cover the seedlings with a vented cloche. A plastic pop bottle cut in half with a lot of air holes punched into it would work fine. A few days of cold weather will STOP a loofah from growing and it could take a month before they get over the shock.
- Keep the loofah watered. No water equals no growing! Now you wait. And wait. And wait.
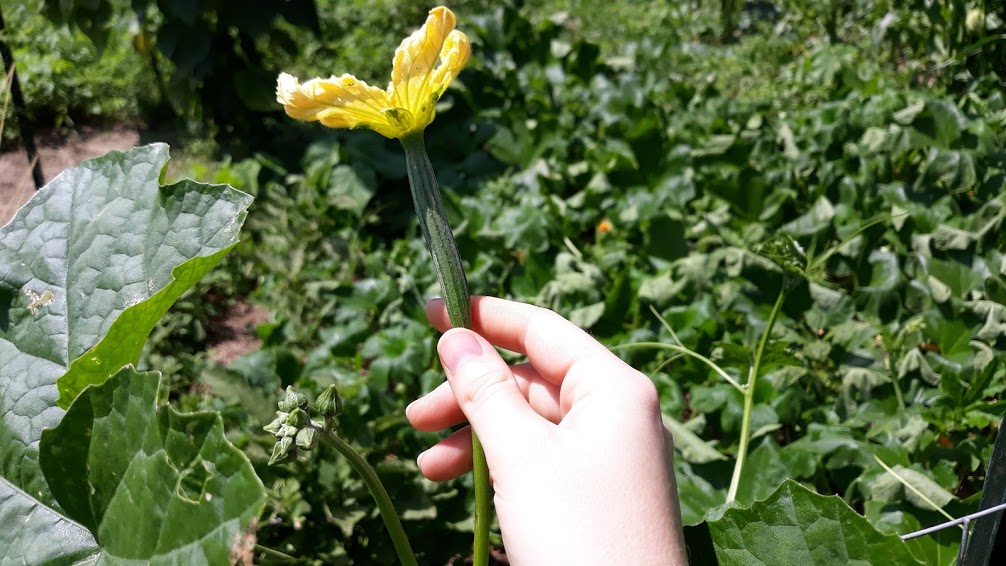
- Two months before your first frost date (by early August in 5b/5a) you need to pinch away all the flowers on the vine. This is important because it will direct all the plant’s remaining energy to growing the loofahs that are on the vine now instead of starting all new tiny loofahs from the flowers that have no chance of ever getting big enough to harvest. THIS IS CRUCIAL.
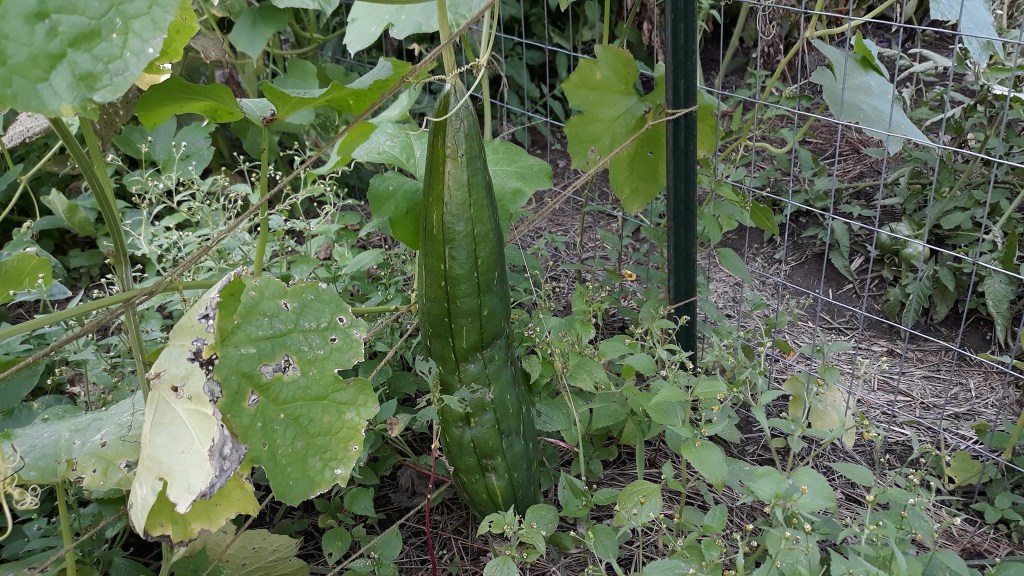
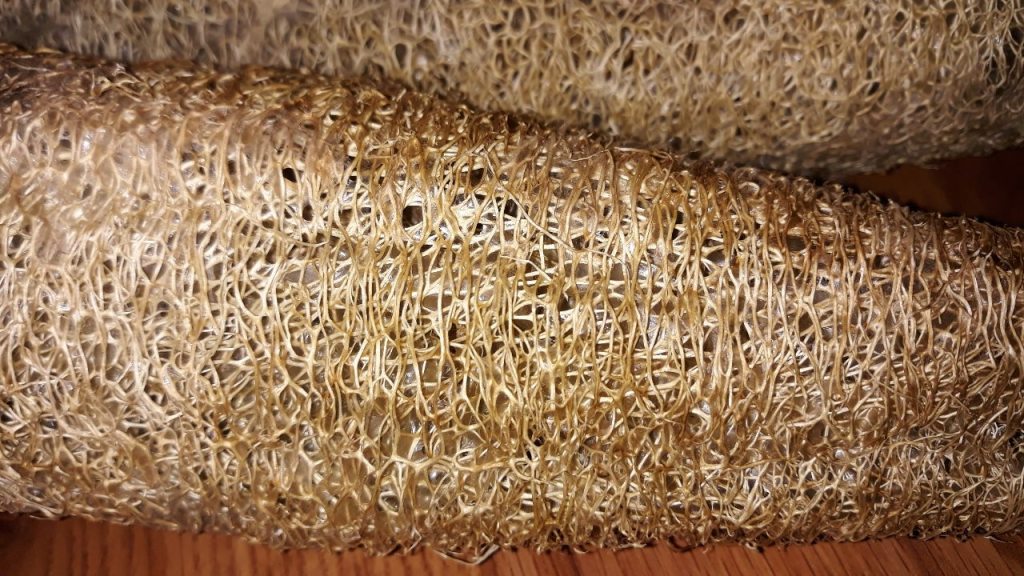
- By October you should have big, green loofahs. Pick your loofah sponges BEFORE they’re hit by frost even if they’re still green. Technically you aren’t supposed to pick them until they’re dried out and brown, but in zone 5 it can sometimes, depending on weather and climate change, be rare for them to get to that stage. You can still pick them when they’re green and get perfectly acceptable loofahs. They’re just a bit harder to peel. (THE FARMER BEAT TIP: to be able to process viable seed for next season, you’ll want your loofahs to dry out on the vine)
